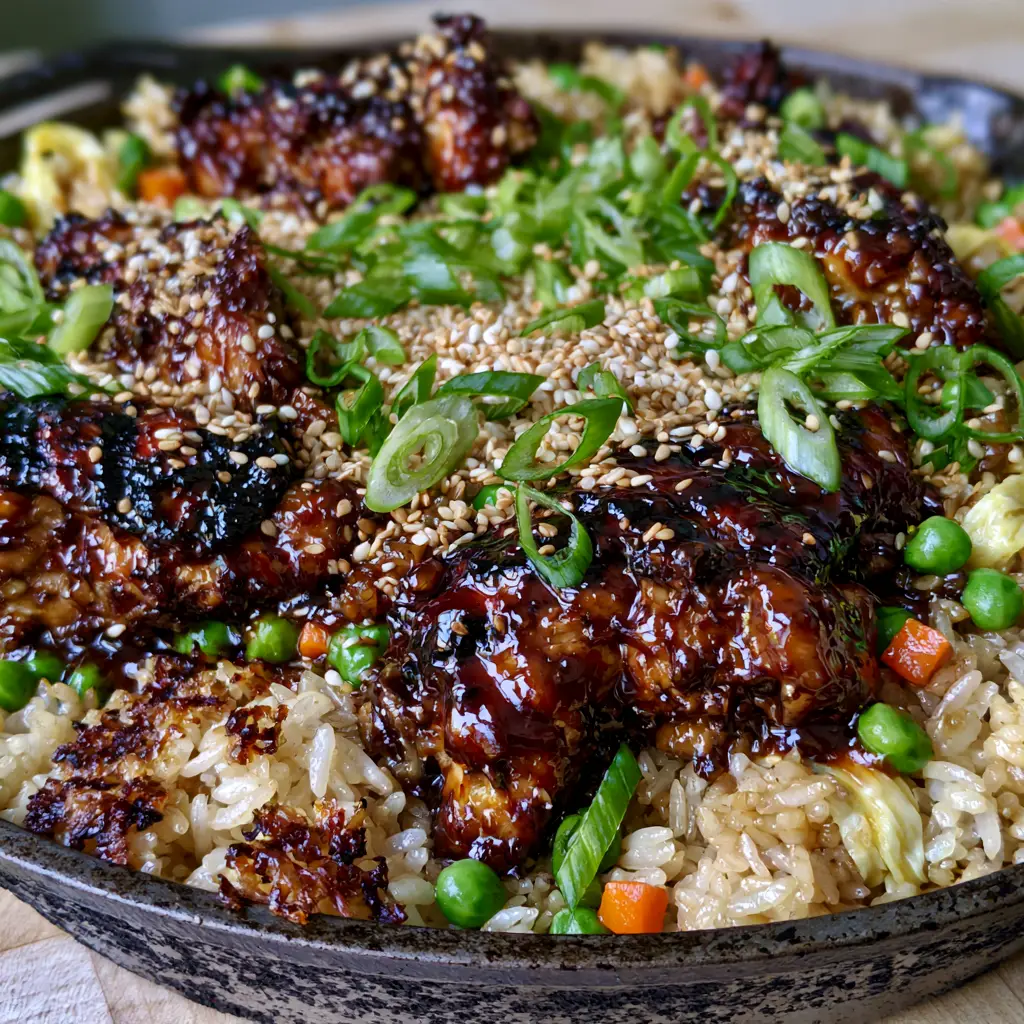
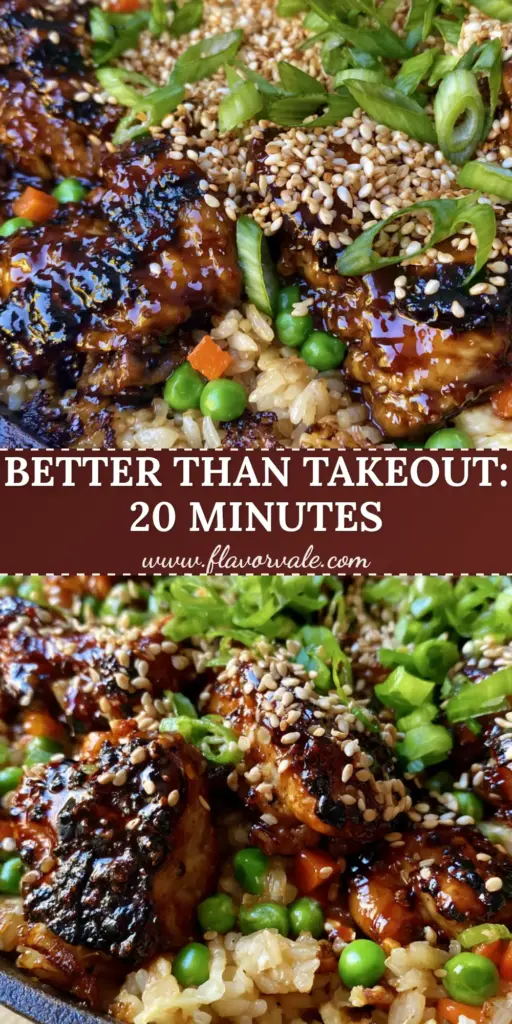
There is a specific, undeniable magic that happens when high-heat searing meets a sweet-and-savory glaze. This Teriyaki Chicken Fried Rice isn’t just another takeout-at-home recipe; it is a masterclass in texture, featuring succulent chicken thigh chunks heavily coated in a thick, glossy, dark mahogany glaze.
Imagine pulling a seasoned black cast iron skillet from the stovetop, the jasmine rice still crackling and popping against the hot metal. You see those visible bits of crispy seared edges, the vibrant green of tender-crisp peas, and the brilliant orange of finely diced carrots peeking through the golden-brown grains.
By using professional culinary techniques, we transform simple pantry staples into a restaurant-quality meal. This dish captures the authentic food blogger aesthetic with its dense flurry of toasted white sesame seeds and a generous scattering of thinly sliced, bright green scallions that look fresh and crisp against the sticky sauce.
Why This Mahogany Glazed Chicken Fried Rice Works
- Textural Contrast: We achieve the perfect balance between fluffy jasmine rice and those coveted crispy “scorched” bits from the cast iron skillet.
- Mahogany Glaze Depth: The chicken is seared to develop a charred crust before being finished in a thick teriyaki reduction for maximum umami.
- Visual Vibrancy: The combination of soft egg ribbons, bright peas, and finely diced carrots creates a professional, high-end presentation.
- One-Pan Efficiency: Using a cast iron skillet allows for superior heat retention, ensuring the chicken thighs stay succulent while the rice fries perfectly.
The Secret Pantry Staples for the Ultimate Teriyaki Glaze
1.5 lbs (680g) Chicken Thighs: We use boneless, skinless thighs cut into chunky pieces because they remain succulent under high heat, unlike breast meat which can dry out. The fat content in thighs is essential for achieving that charred grill-mark look described in our visual blueprint.
3 cups (450g) Cold Jasmine Rice: Using day-old, chilled rice is non-negotiable for achieving fluffy, individual grains. Freshly cooked rice contains too much moisture and will turn into a gummy mess instead of golden-brown fried rice.
1/2 cup (120ml) Dark Teriyaki Sauce: For that thick, mahogany appearance, look for a premium sauce or make a quick reduction of soy sauce, mirin, and brown sugar. This provides the sticky highlights that catch the light in your final dish.
2 tbsp (30ml) Neutral Oil: A high-smoke point oil like vegetable or canola is required for the initial sear. This is what creates the “wok hei” or breath of the pan, leading to those beautiful charred edges on the chicken.
1 cup (150g) Frozen Green Peas and Carrots: These provide the classic fried rice aesthetic and a pop of sweetness. We finely dice the carrots to ensure they cook at the same rate as the peas and rice.
3 Large Eggs: These are whisked and fried into soft ribbons. The eggs provide a delicate, protein-rich contrast to the savory, salty grains of rice.
Garnishes for the Authentic Aesthetic: A dense flurry of 2 tbsp (18g) toasted white sesame seeds and 3 stalks of thinly sliced green scallions. These aren’t just for flavor; they provide the crisp, fresh texture that defines a high-quality food blogger dish.
Essential Equipment for Skillet-Seared Perfection
To achieve the results seen in the Midjourney prompt, a seasoned 12-inch (30cm) cast iron skillet is the preferred tool. Its ability to hold heat is far superior to a standard non-stick pan, which is vital for getting those crispy rice bits and charred chicken marks.
You will also need a sturdy metal spatula to scrape the bottom of the pan. This ensures you don’t lose any of the flavorful “fond” or the crispy rice edges that develop during the frying process. If you’re looking for more quick meal ideas, you might also enjoy our 30-minute vegetarian meals for busy weeknights.
Mastering the Art of the Mahogany Chicken Sear
Phase 1: Preparing the Chicken for the Glaze
Pat your chicken thigh chunks completely dry with paper towels. Season them lightly with salt and pepper, but avoid adding any sugar-based marinades yet. Heat your skillet over medium-high heat until the oil is shimmering and just starting to smoke.
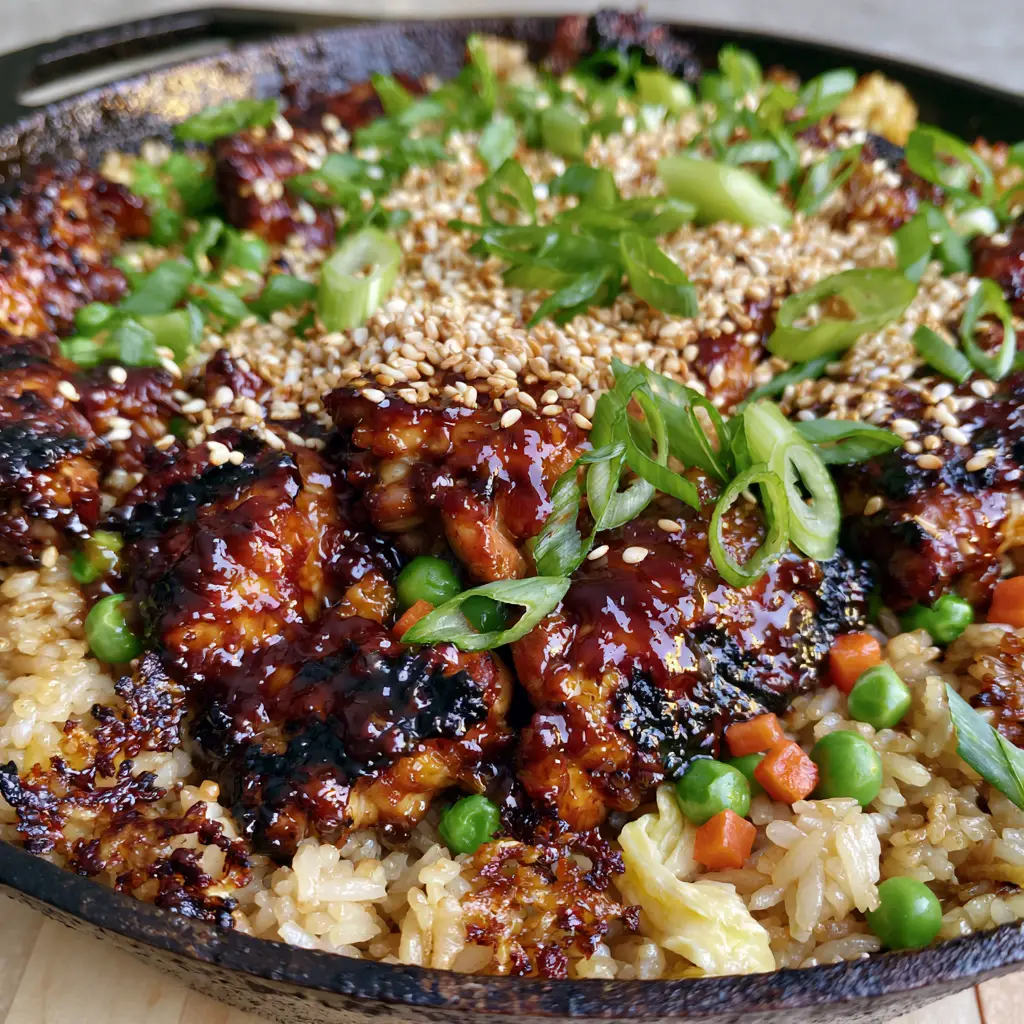
Add the chicken in a single layer, ensuring you don’t crowd the pan. Let them sit undisturbed for 3-4 minutes until a deep, dark brown crust forms. Flip the pieces to see those beautiful charred grill marks, then pour over half of the teriyaki sauce, tossing to coat until it becomes a thick, sticky mahogany glaze.
Phase 2: Building the Fluffy Golden-Brown Base
Remove the chicken from the skillet and set aside. In the same pan (don’t wash it!), add another tablespoon of oil and sauté your finely diced carrots until they begin to soften. Push the veggies to one side and pour in your whisked eggs, scrambling them quickly into soft ribbons before incorporating them with the carrots.
Add the cold jasmine rice to the center of the skillet. Use your spatula to break up any clumps. Press the rice down firmly into the bottom of the hot skillet and let it fry for 2 minutes without moving it. This is the secret to getting those visible bits of crispy seared edges mentioned in our visual recipe blueprint.
Phase 3: The Final Fusion and Garnish
Fold in the green peas and the remaining teriyaki sauce. The sauce should immediately begin to caramelize, turning the rice a beautiful golden-brown. Return the glazed chicken chunks to the skillet, tossing everything together until the rice is evenly coated and steaming hot.
Remove from heat and immediately garnish with a dense flurry of toasted white sesame seeds. Finish with a generous scattering of thinly sliced green scallions. The residual heat will slightly soften the scallions while keeping them bright green and fresh, perfectly matching our authentic food blogger aesthetic.
Expert Tips for Success
- The Temperature Rule: Always ensure your skillet is piping hot before adding the rice. If the pan is too cool, the rice will absorb the oil and become greasy rather than crispy.
- Rice Hydration: If using freshly cooked rice is your only option, spread it out on a baking sheet and place it in front of a fan for 20 minutes to dry out the surface moisture.
- Sauce Control: Don’t add too much teriyaki sauce at once. The sugar in the sauce can burn quickly; you want it to glaze the food, not pool at the bottom of the pan.
- Skillet Maintenance: If bits of egg or rice stick to the pan, add a tiny splash of water or rice wine to deglaze the surface, which helps lift those flavorful crispy bits back into the dish.
Storage, Reheating, and Meal Prep
This Teriyaki Chicken Fried Rice makes for incredible leftovers. Store any remaining portions in an airtight container in the refrigerator for up to 4 days. Because the chicken thighs are succulent and the rice is well-oiled, it won’t dry out like other varieties of fried rice.
To reheat, avoid the microwave if possible. Instead, toss the rice back into a hot skillet with a teaspoon of water. This creates steam that refreshes the grains while allowing the edges to become crispy once again. If you’re planning a full spread, consider pairing this with a cucumber onion tomato salad for a refreshing crunch.
What to Pair with Your Skillet Fried Rice
While this dish is a complete meal on its own, it pairs beautifully with side dishes that cut through the richness of the mahogany glaze. A side of grilled veggie skewers adds a smoky, charred element that complements the teriyaki flavor profile.
For a complete Japanese-inspired dinner party, you could also serve this alongside our Japanese BBQ chicken fried rice for a side-by-side comparison of different glazing techniques. If you’re looking for something lighter, a simple green salad or a chilled lemonade moscato wine spritzer works wonders as a palate cleanser.
Frequently Asked Questions
Yes, but thighs are preferred for their higher fat content, which prevents them from drying out during the high-heat searing required for that mahogany glaze.
While a wok or non-stick pan works, a cast iron skillet is the best tool for home cooks to achieve the crispy seared edges and charred chicken marks shown in the recipe.
The secret is the sugar content and heat. Let the sauce reduce in the hot skillet with the chicken until it bubbles and coats the meat in a thick, mahogany layer.
Mushy rice is usually caused by using freshly cooked rice. Day-old, chilled jasmine rice has less surface moisture, allowing the grains to fry rather than steam.
The Ultimate Teriyaki Chicken Fried Rice Recipe
Teriyaki Chicken Fried Rice with Crispy Skillet Edges
Ingredients
Equipment
Method
- Heat oil in a cast iron skillet. Pat chicken dry and sear until charred grill marks form. Add half the teriyaki sauce and glaze until mahogany and sticky. Remove chicken.
- In the same skillet, sauté carrots until tender-crisp. Scramble eggs into soft ribbons and mix with carrots.
- Add chilled jasmine rice. Press down and fry for 2 minutes to create crispy seared edges. Fold in peas and remaining sauce.
- Return chicken to pan, toss to combine. Garnish with a flurry of toasted sesame seeds and fresh green scallions.
Notes
Keep the skillet high-heat for the 'wok hei' effect.
Bringing the Flavor Vale Home
There is nothing more satisfying than mastering a dish that looks as good as it tastes. This Teriyaki Chicken Fried Rice, with its succulent mahogany chicken and crispy skillet-fried grains, is a testament to the power of simple ingredients treated with professional care. We hope this becomes a staple in your dinner rotation!
If you loved this recipe, please leave a comment below and let us know how your crispy rice bits turned out! Don’t forget to follow us and share your creations on Pinterest to help other home cooks find their next favorite meal.