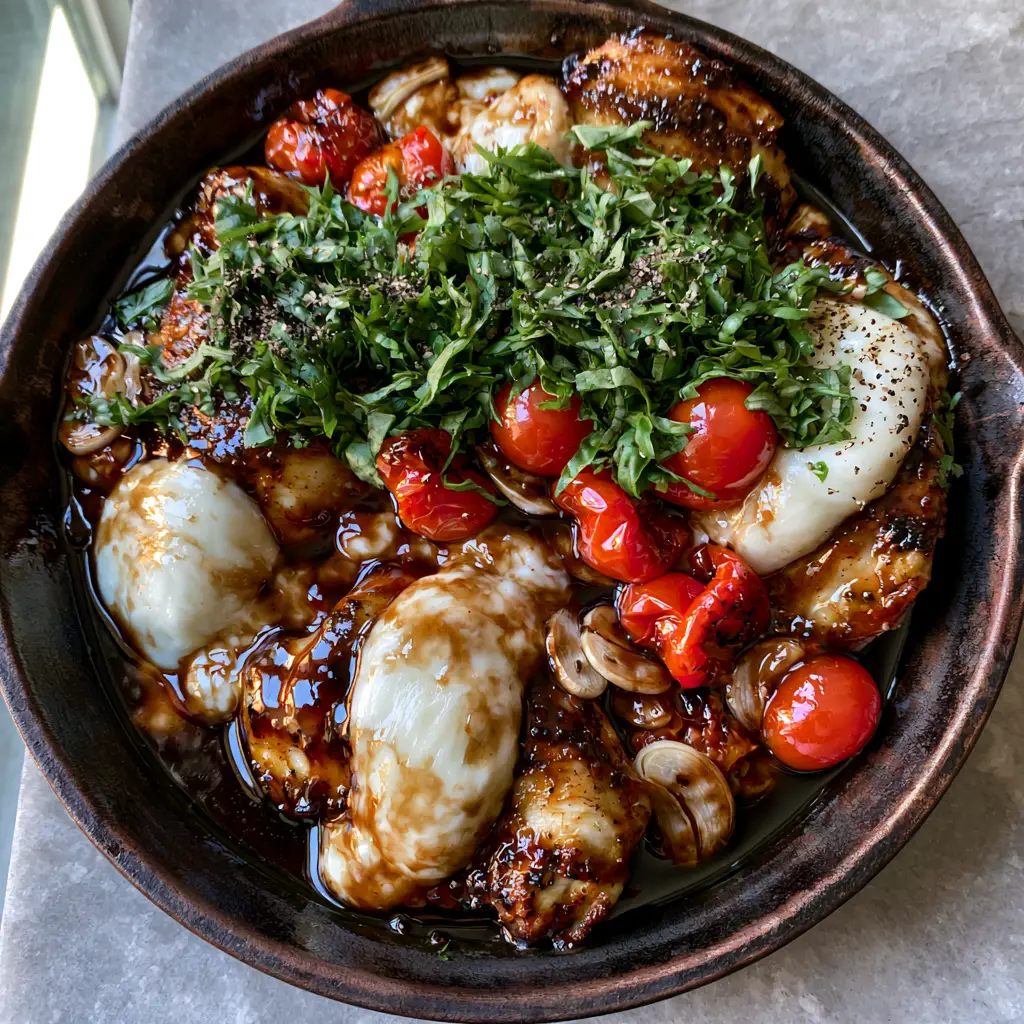
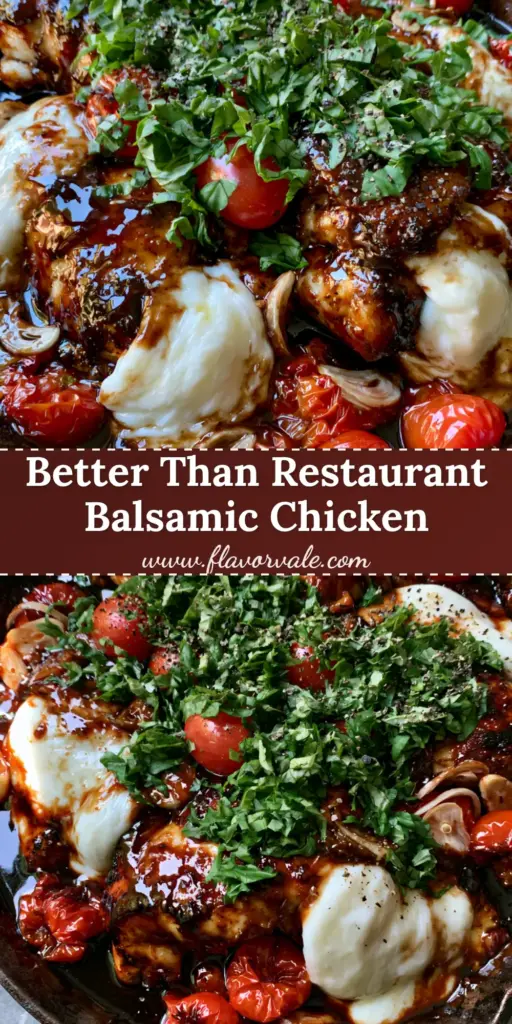
There is a specific kind of culinary magic that happens when a rustic black cast iron skillet meets the high heat of a kitchen range. The One Pan Balsamic Chicken we are crafting today isn’t just a meal; it is a sensory experience defined by a thick, glossy, mahogany-colored balsamic glaze that clings to every succulent fiber of the meat. Imagine pulling a heavy pan from the heat, the surface still sizzling, with large, gooey rounds of white fresh mozzarella draped elegantly over golden-brown chicken breasts.
This recipe is designed for the home cook who craves the visual and flavorful complexity of a high-end Italian bistro but needs the convenience of a thirty-minute cleanup. We are bridging the gap between professional searing techniques and weeknight practicality. Every element, from the blistered bright red cherry tomatoes that pop with sweetness to the thinly sliced garlic cloves that mellow in the glaze, has been curated to create a visually stunning and palate-cleansing masterpiece.
As you prepare this dish, you will notice the soft, natural daylight reflecting off the glistening, sticky texture of the reduction. The aroma of freshly chopped green basil hitting the hot pan provides an instant olfactory reward. Whether you are looking for a quick upgrade to your usual rotation or a centerpiece for a weekend dinner, this dish delivers on every promise of texture and taste.
Why This One-Pan Masterpiece Works Every Single Time
- The Mahogany Glaze Depth: By reducing balsamic vinegar with a touch of sweetener, we create a thick, syrupy coating that provides both acidity and a rich, dark aesthetic.
- Textural Contrast: You get the crunch of the golden-brown sear, the softness of melted mozzarella, and the “pop” of blistered cherry tomatoes in every bite.
- Visual Brilliance: The contrast between the vibrant green basil, bright red tomatoes, and snowy white cheese against the dark cast iron makes this a photographer’s dream.
- Effortless Cleanup: By utilizing a single skillet, we maximize flavor development through fond (the brown bits at the bottom) while minimizing the post-dinner scrubbing.
- Perfect Protein Searing: We utilize professional heat management to ensure the chicken remains juicy inside while developing a deep, caramelized crust on the outside.
The Essential Elements for a Glossy Balsamic Finish
To achieve the visual result seen in professional food photography, every ingredient must serve a specific purpose. We aren’t just feeding people; we are building layers of flavor and color. Choosing high-quality ingredients is the first step in ensuring your One Pan Balsamic Chicken looks as good as it tastes.
Chicken Breasts: Use 1.5 lbs (680g) of boneless, skinless chicken breasts, pounded to an even thickness. This ensures they cook uniformly and provide a flat surface for the mozzarella to melt over.
Balsamic Vinegar: You will need 1/2 cup (120ml) of a decent quality balsamic. It doesn’t need to be the most expensive aged variety, as we will be reducing it to create that signature mahogany shine.
Fresh Mozzarella: 8 oz (225g) of fresh mozzarella, preferably the logs that can be sliced into thick rounds. Its high moisture content leads to that gooey, draped look that processed cheese simply cannot replicate.
Cherry Tomatoes: 2 cups (300g) of bright red cherry or grape tomatoes. These are essential for the “blistered” look, providing bursts of acidity to cut through the rich glaze.
Fresh Garlic: 4 cloves, thinly sliced rather than minced. Slicing the garlic allows it to brown gently and become a visible garnish in the final skillet presentation.
Honey or Maple Syrup: 2 tbsp (30ml) to act as a catalyst for caramelization. This foundational invisible ingredient helps the glaze reach that sticky, glistening consistency we are looking for.
Extra Virgin Olive Oil: 2 tbsp (30ml) for the initial sear. We need a high-quality fat to facilitate the Maillard reaction, giving the chicken its golden-brown crust.
Fresh Basil: 1/2 cup (15g) of loosely packed leaves, freshly chopped. The vibrant green color is the final “pop” that completes the visual blueprint of the dish.
Kosher Salt and Cracked Black Pepper: Essential for seasoning the protein and providing the heavy, textured garnish seen in the rustic photo prompt.
Tools Required for the Ultimate Skillet Sear
While you can make this in a standard frying pan, a rustic black cast iron skillet is the preferred vessel. Cast iron retains heat exceptionally well, which is crucial for achieving the blistered tomatoes and the deep sear on the chicken without overcooking the center. The dark background of the iron also makes the colors of the tomatoes and basil stand out more vividly.
You will also need a pair of sturdy tongs for flipping the chicken, a sharp chef’s knife for slicing the garlic and basil, and a small whisk to combine the balsamic and honey. If you enjoy this cooking style, you might also find success with our sheet pan chicken fajitas for another low-cleanup, high-flavor meal.
Mastering the Sear: A Step-by-Step Guide to the Perfect Pan
Phase 1: Preparing the Protein and Skillet
Begin by patting your chicken breasts dry with paper towels. This is a critical step; moisture is the enemy of a good sear. Season both sides generously with kosher salt and half of your cracked black pepper. The pepper should be visible on the surface of the meat.
Place your cast iron skillet over medium-high heat and add the olive oil. Wait until the oil is shimmering and just starting to send up a faint wisp of smoke. This is your sensory cue that the pan is ready for the chicken. If the oil isn’t hot enough, the chicken will stick and steam rather than sear.
Phase 2: Achieving the Golden-Brown Crust
Carefully lay the chicken breasts in the pan, laying them away from you to avoid oil splatter. Let them cook undisturbed for 5-6 minutes. Resist the urge to peek! You are looking for a deep, golden-brown crust to form. Once the chicken releases easily from the pan, flip it over. The chicken should already look appetizing and partially cooked.
Move the chicken to the outer edges of the skillet and add the cherry tomatoes and sliced garlic to the center. The tomatoes will begin to sizzle and the skins will start to shrivel and char—this is the “blistering” process. Stir them occasionally for 2-3 minutes until they begin to soften but still hold their shape.
Phase 3: The Mahogany Glaze Reduction
In a small bowl, whisk together the balsamic vinegar and honey. Pour this mixture directly into the skillet. It will bubble vigorously as it hits the hot metal. Use a wooden spoon to scrape up any brown bits (the fond) from the bottom of the pan; this incorporates deep savory flavor into your glaze.
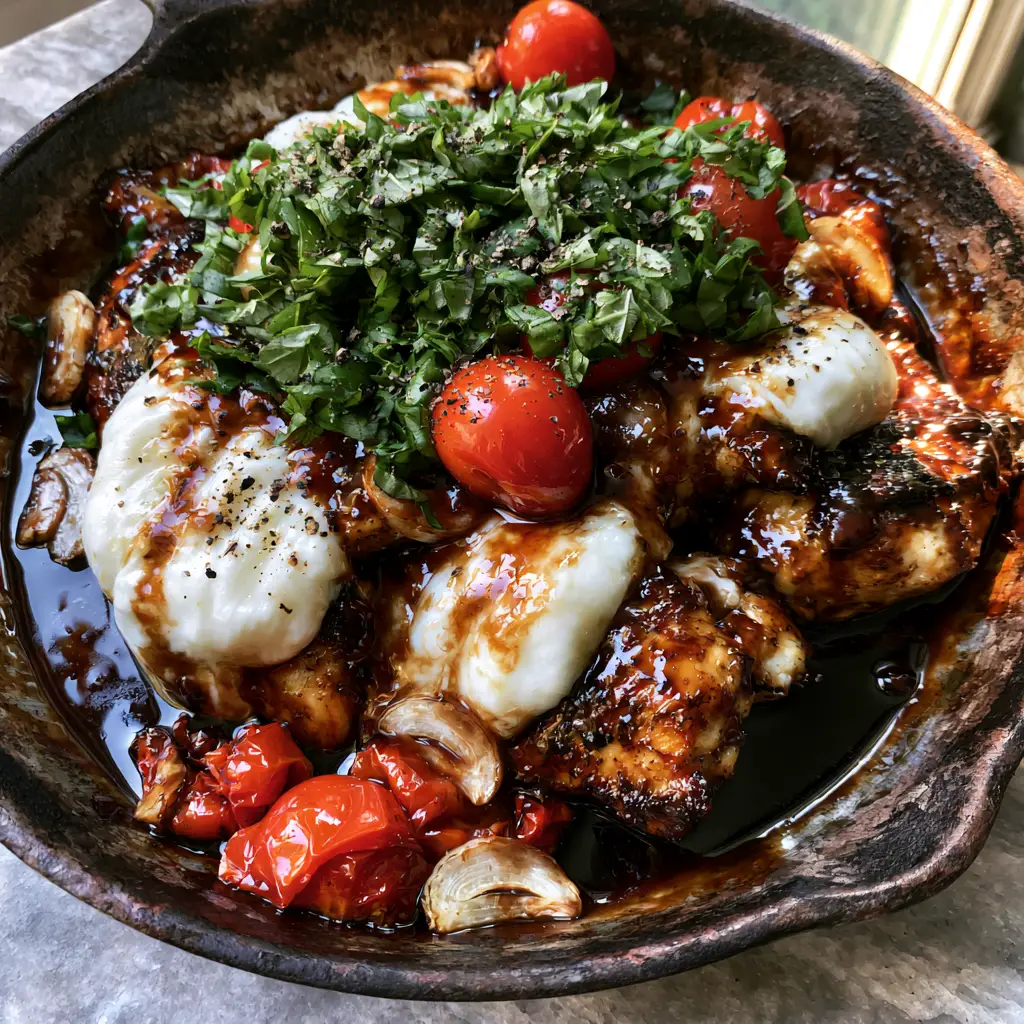
Lower the heat to medium and let the liquid simmer. As the water evaporates, the sugars will concentrate, turning the liquid into a thick, mahogany-colored syrup. Spoon the glaze over the chicken repeatedly. You want the chicken to look glistening and sticky, exactly like the visual blueprint suggests.
Phase 4: The Final Melt and Garnish
Once the glaze has thickened and the chicken has reached an internal temperature of 160°F (71°C), place the thick rounds of fresh mozzarella on top of each breast. Cover the skillet with a lid for 60-90 seconds. You want the cheese to be large, gooey, and draped over the sides, but not completely liquified.
Remove the lid and take the pan off the heat. Scatter the freshly chopped basil over the entire skillet. The residual heat will wake up the oils in the basil, releasing a fresh, peppery aroma. Finish with an extra flourish of cracked black pepper and the remaining sliced garlic cloves.
Expert Tips for Success
- Deglazing Secret: If your glaze becomes too thick or “tacky” before the chicken is done, add a splash of water or chicken broth (1 tbsp at a time) to loosen it back to a glossy consistency.
- The Mozzarella Temperature: Let your fresh mozzarella sit at room temperature for 20 minutes before adding it to the pan. Cold cheese takes longer to melt, which might lead to overcooking the chicken.
- Tomato Timing: If you prefer your tomatoes more intact, add them later in the process. For a “saucy” tomato vibe, add them right when you flip the chicken.
- Resting the Meat: Let the chicken rest in the pan for 3-5 minutes after removing from the heat. This allows the juices to redistribute, ensuring every bite is moist.
Storage, Reheating, and Freezing
This One Pan Balsamic Chicken is best enjoyed immediately while the cheese is at its stretchiest. However, leftovers can be stored in an airtight container in the refrigerator for up to 3 days. The glaze will thicken further in the fridge, so you may need to add a teaspoon of water when reheating.
To reheat, place the chicken in a skillet over low heat with a lid on. Avoid the microwave if possible, as it can make the chicken rubbery and the mozzarella tough. We do not recommend freezing this dish, as the texture of fresh mozzarella and blistered tomatoes changes significantly upon thawing.
What to Serve With This Skillet Meal
To balance the acidity of the balsamic and the richness of the mozzarella, consider a light, crisp side. A cucumber onion tomato salad is a fantastic way to double down on fresh garden flavors. If you are looking for a starch, a simple bed of buttery orzo or crusty sourdough bread is perfect for mopping up the extra mahogany glaze.
For a refreshing pairing, a lemonade moscato wine spritzer cuts through the richness of the cheese beautifully. If you’re planning a larger spread, these grilled veggie skewers make an excellent companion that keeps the meal feeling light and vibrant.
Frequently Asked Questions
While you can use dried basil in the glaze for flavor, it won’t provide the vibrant green color or fresh aroma required for the visual garnish. Fresh basil is highly recommended for the best results.
By thinly slicing the garlic rather than mincing it, and adding it along with the tomatoes midway through cooking, you ensure it softens and browns without turning bitter or burning.
Yes, fresh mozzarella has a higher moisture content, which allows it to drape over the chicken in large, gooey rounds, creating the professional aesthetic seen in the photos.
The secret lies in the reduction process. By simmering balsamic vinegar with honey or maple syrup, the sugars concentrate and the liquid thickens into a syrupy, dark glaze that coats the chicken perfectly.
Cast iron provides superior heat retention, which is essential for getting deep sear marks on the chicken and properly blistering the cherry tomatoes without losing pan temperature.
The Ultimate One Pan Balsamic Chicken Recipe
One Pan Balsamic Chicken with Melted Mozzarella and Blistered Tomatoes
Ingredients
Equipment
Method
- Pat chicken dry and season with salt and pepper. Heat oil in a cast iron skillet over medium-high heat. Sear chicken for 5-6 minutes until a deep golden-brown crust forms.
- Flip chicken and add cherry tomatoes and sliced garlic to the pan. Cook for 3 minutes until tomatoes blister and garlic softens.
- Whisk balsamic and honey, then pour into the pan. Simmer until the liquid reduces into a thick, mahogany-colored glossy glaze.
- Top chicken with mozzarella rounds. Cover for 90 seconds until cheese is gooey and draped. Garnish with fresh basil and extra black pepper.
Notes
Ensure the glaze reaches a syrupy consistency before adding the cheese.
Bring the Bistro to Your Kitchen
This One Pan Balsamic Chicken is a testament to the fact that simple ingredients, when treated with the right techniques, can create a world-class meal. The combination of the sticky mahogany glaze, the creamy mozzarella, and the pop of blistered tomatoes is a flavor profile that never goes out of style. It’s a dish that looks as though it took hours to prepare but comes together in the time it takes to set the table.
If you loved the textures and colors of this recipe, please leave a comment below and let us know how your sear turned out! Don’t forget to share your skillet photos on Pinterest and tag us. For more easy weeknight inspiration, check out our 30-minute vegetarian meals or our classic chicken fried rice. Happy cooking!